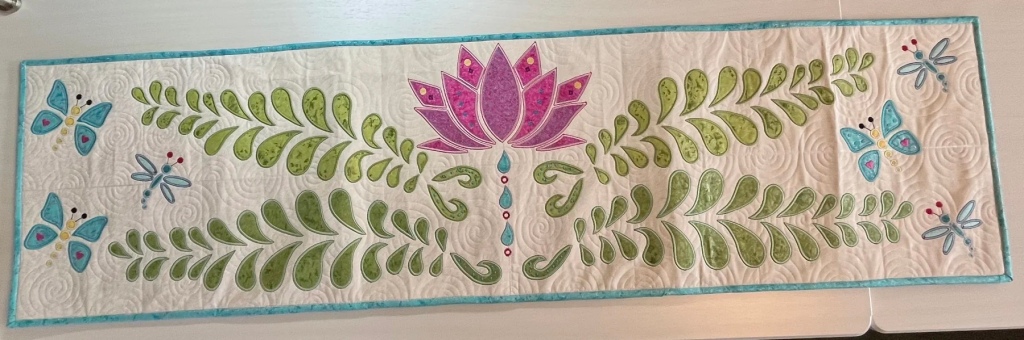
I finished the month 1 center for Visit to Sunshine Cove. So excited to put it together with the quilted background. Need to wait for my binding fabric to arrive.


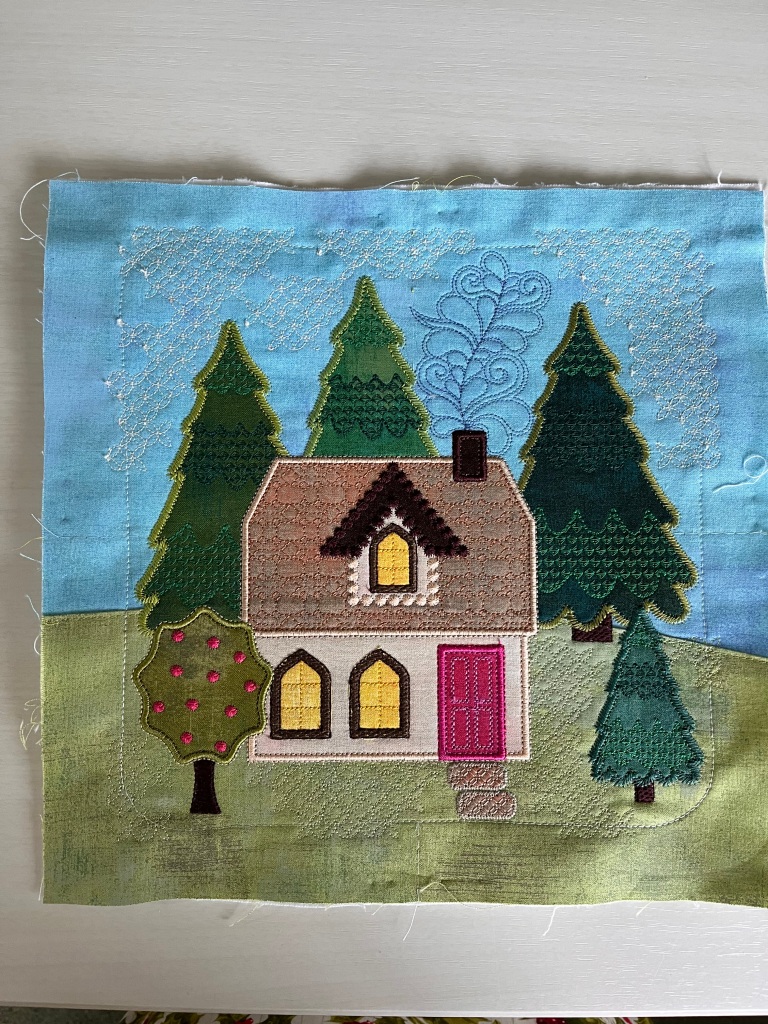
I finished the month 1 center for Visit to Sunshine Cove. So excited to put it together with the quilted background. Need to wait for my binding fabric to arrive.
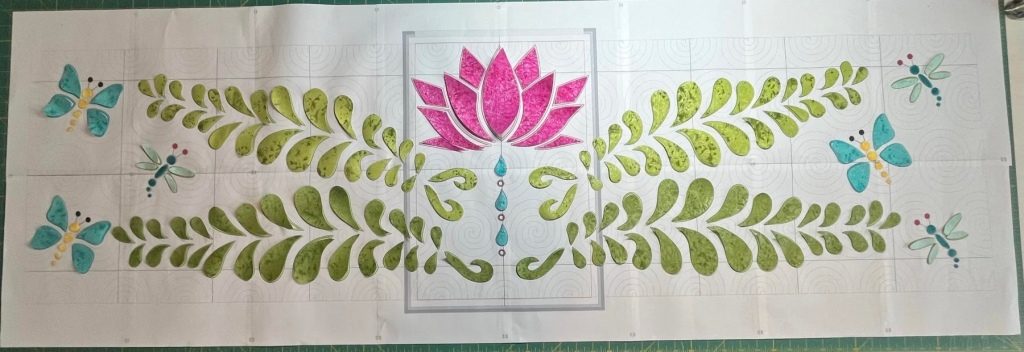
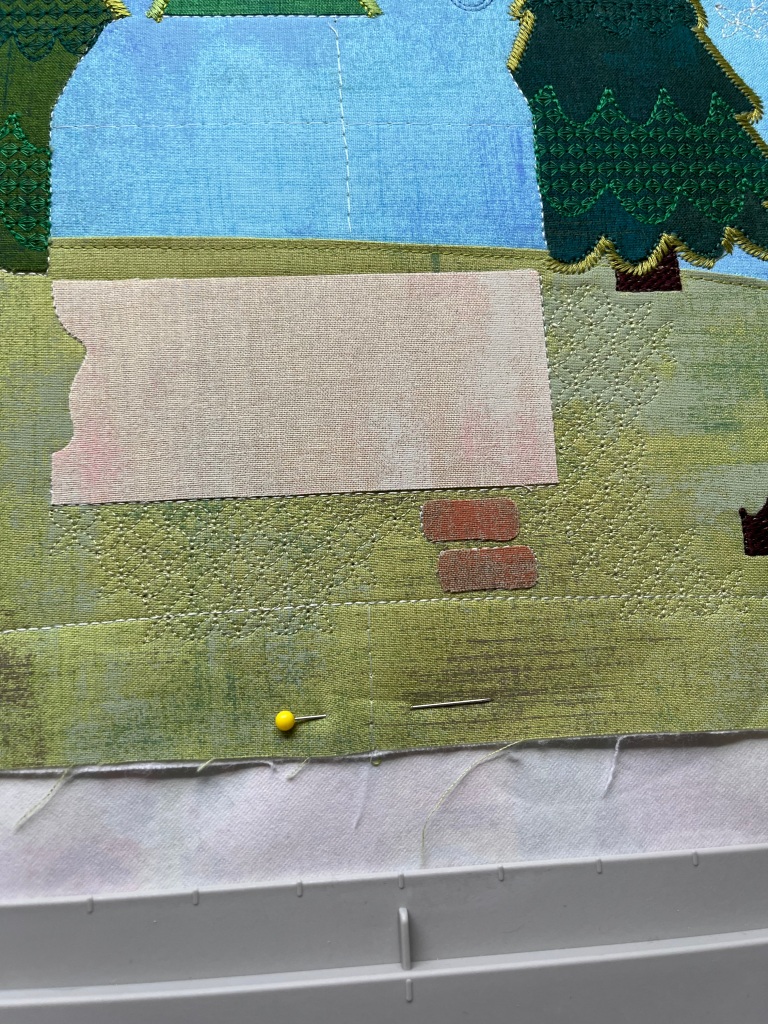
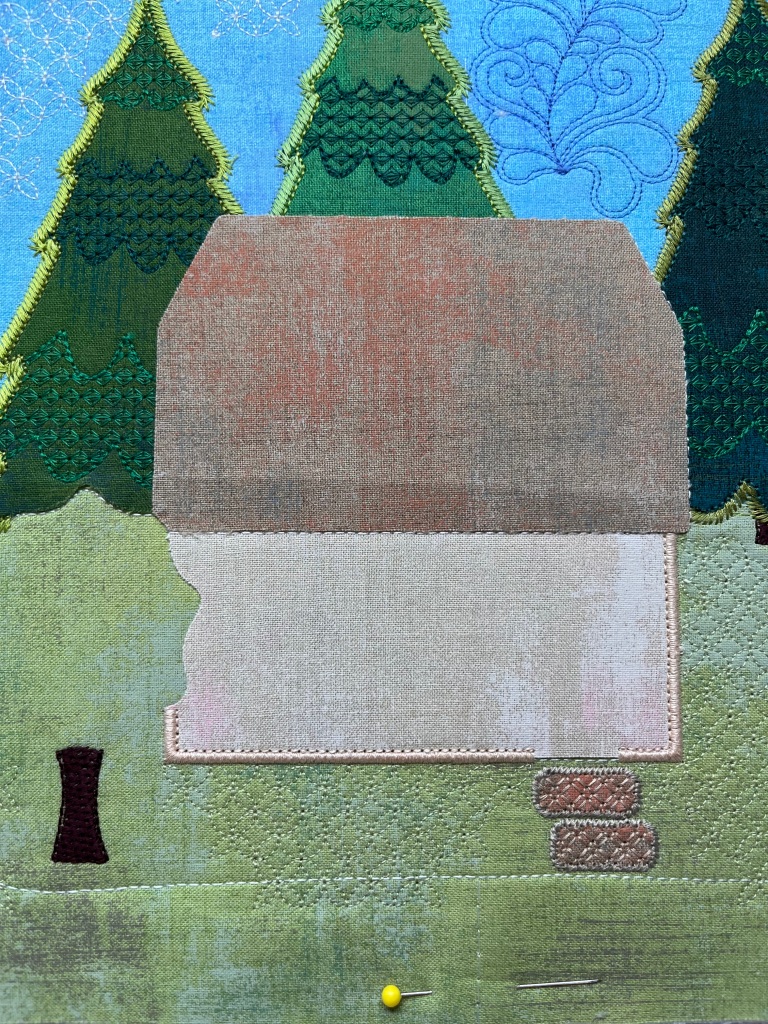
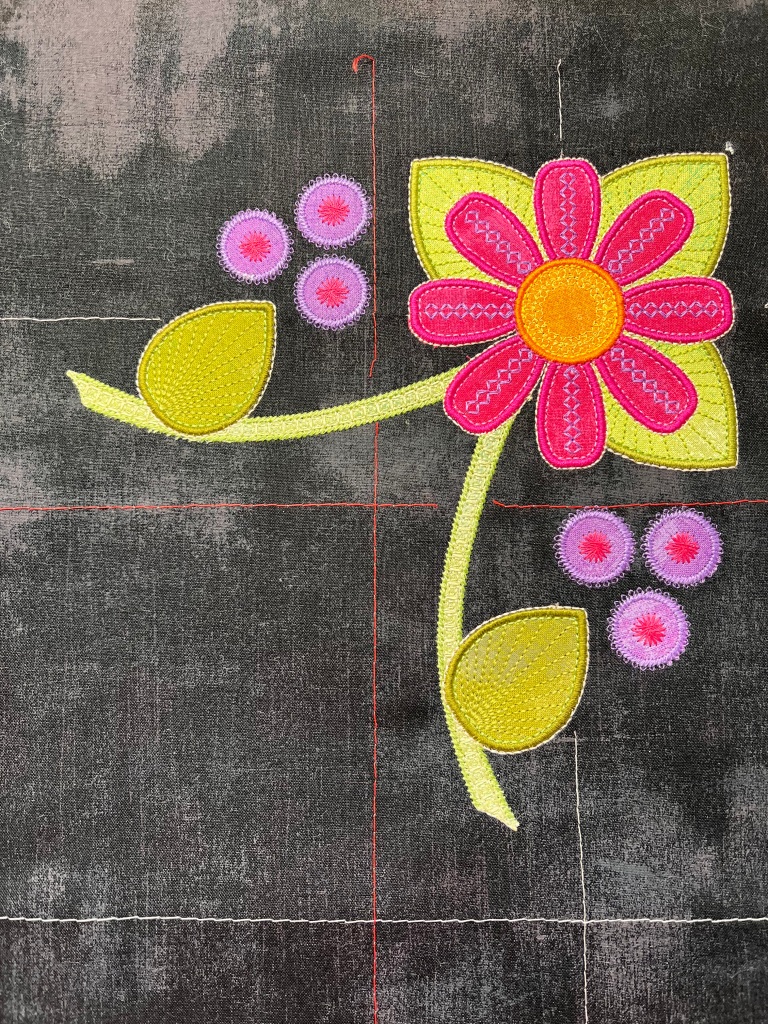
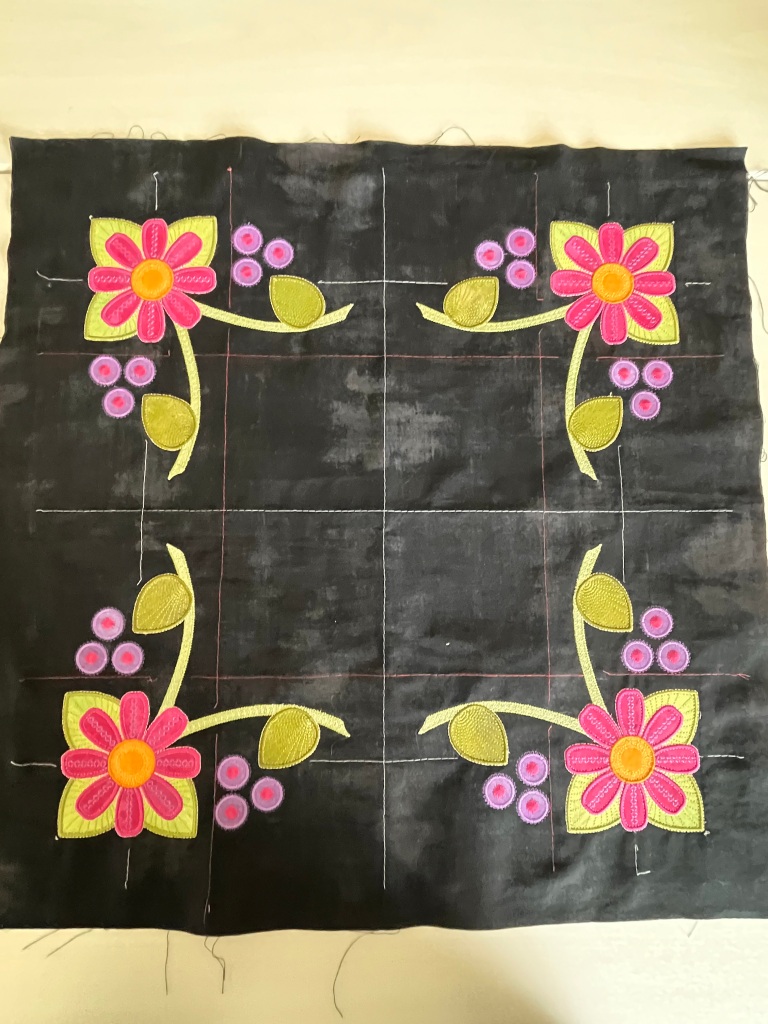
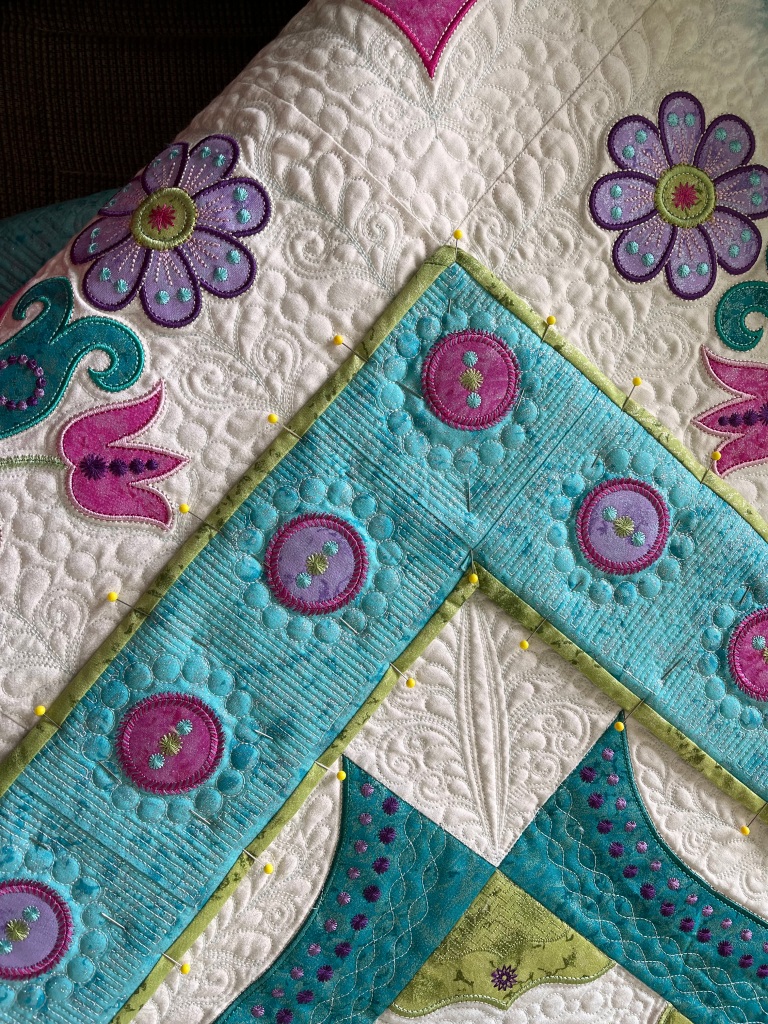
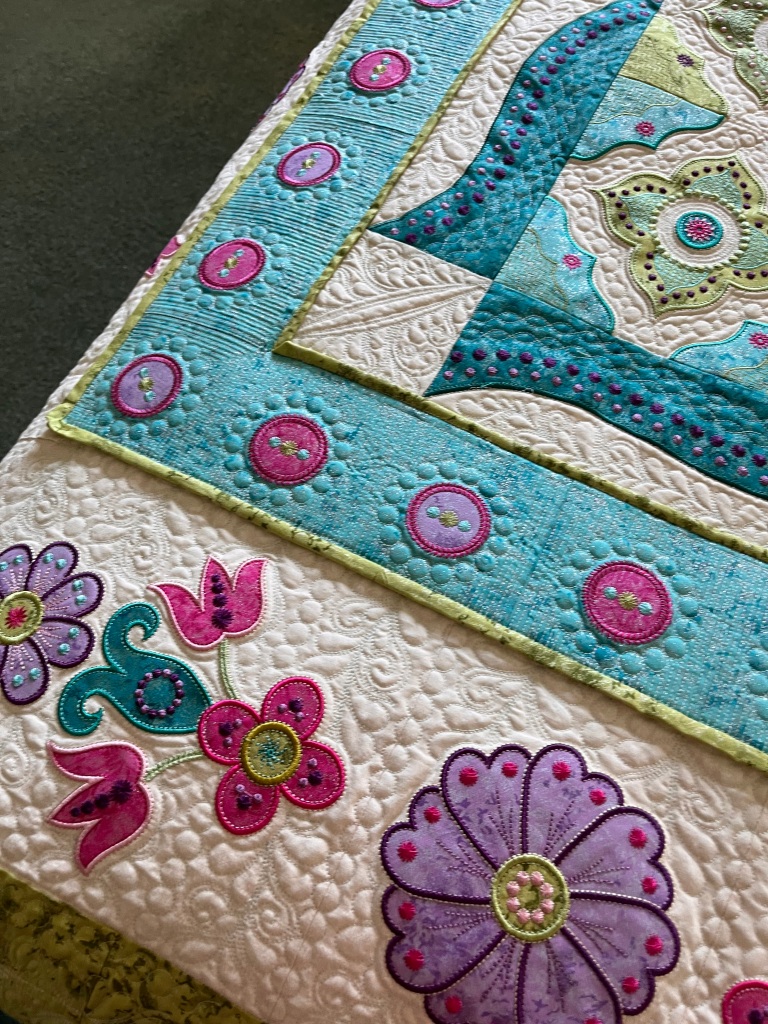
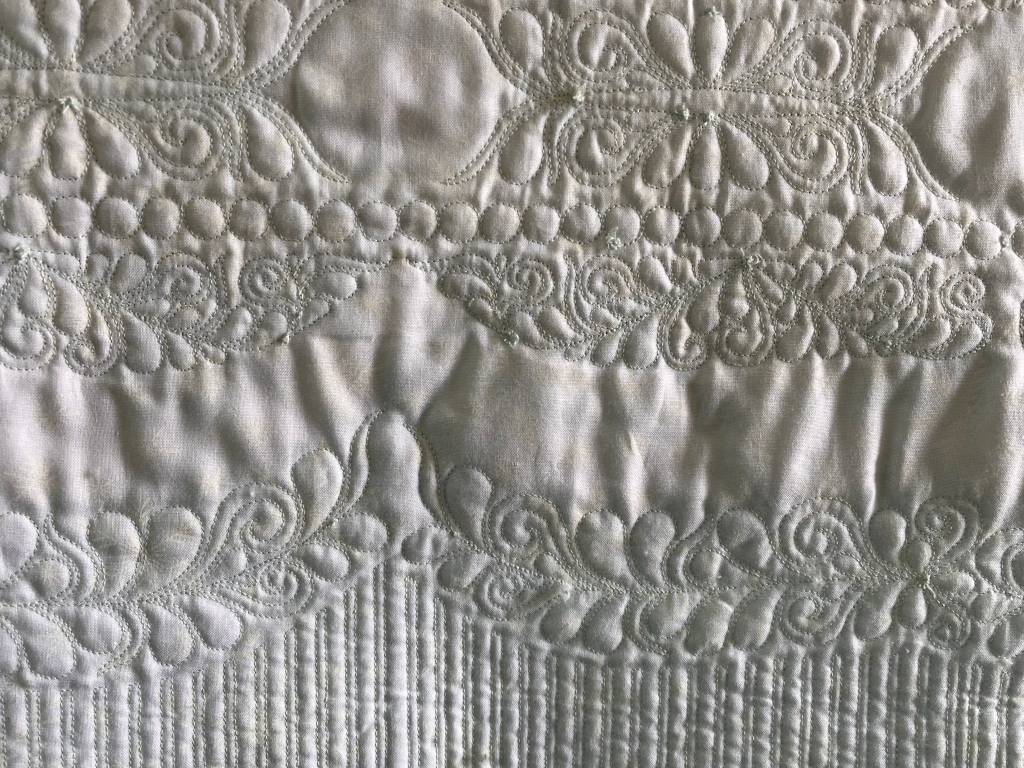
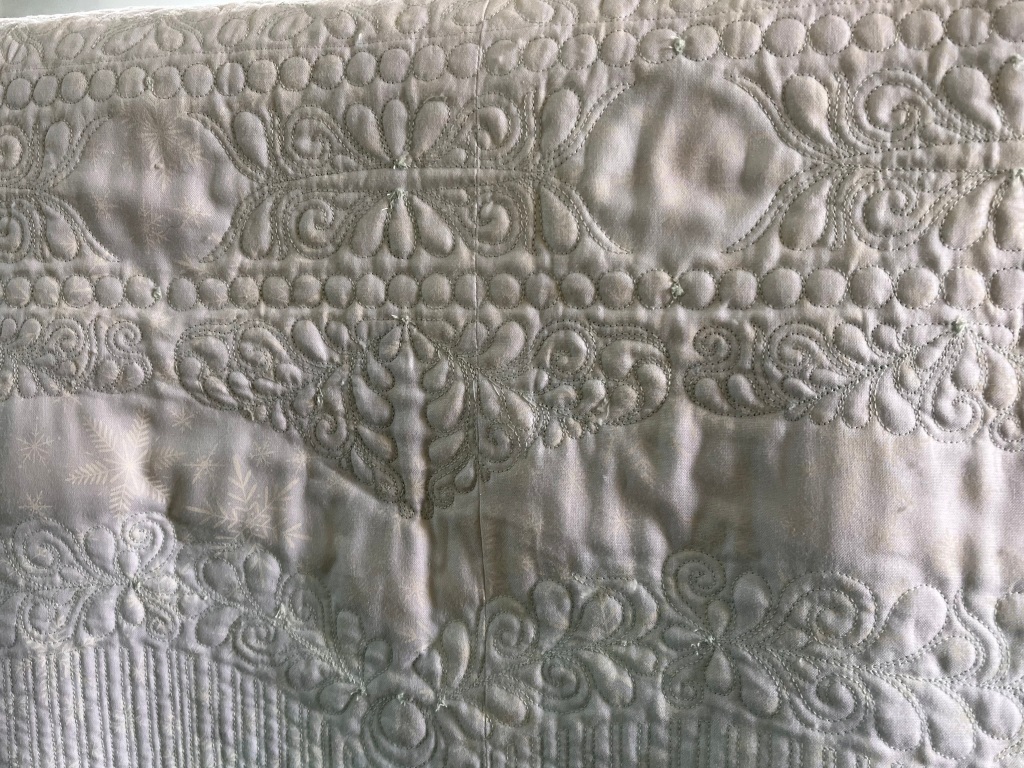
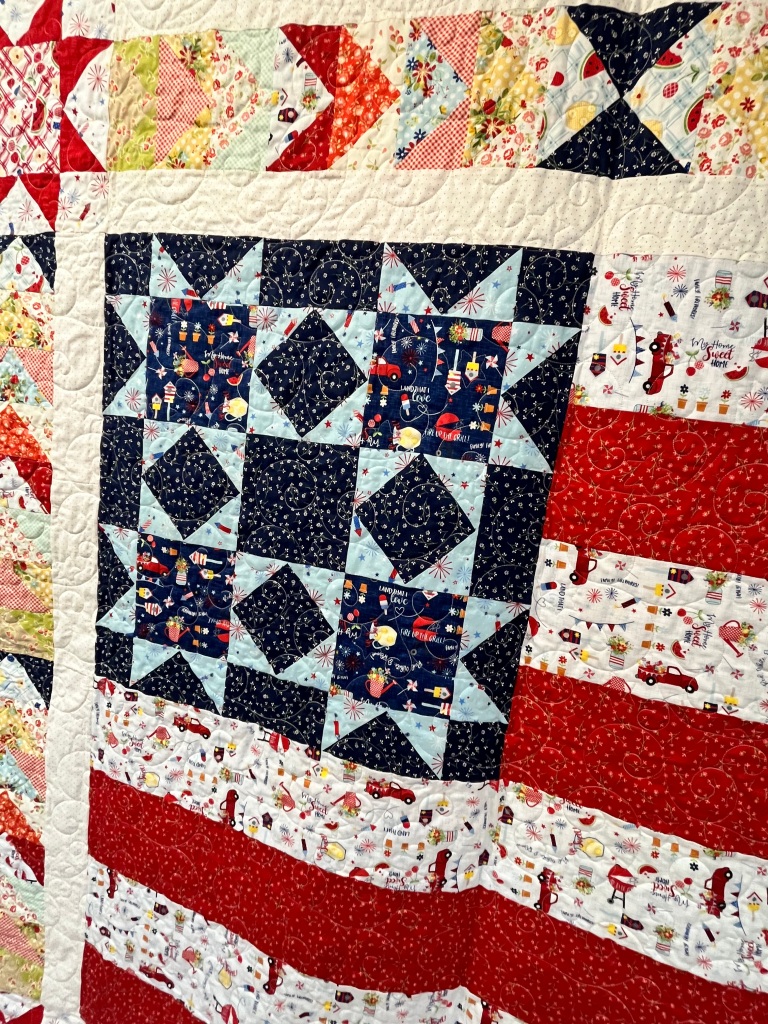
I started Visit to Sunshine Cove this week. The version I am working on is for the 18 inch blocks. I will also have a center medallion. When the top is finished, it should be 106 inches square. Each of the blocks are quilted in the hoop as they are created. The center of each block is a second quilting that is bound. The center is then appliquéd to the quilted large block. This makes the back of the quilt so much cleaner. I also discovered if I turn off the trim feature, when quilting, the back is much better. I then clip the jumps when the quilting is finished.


Yesterday I had time to add 1/4 inch fusible webbing to both the inside and outside border edges. Next was pressing the raw edges down.


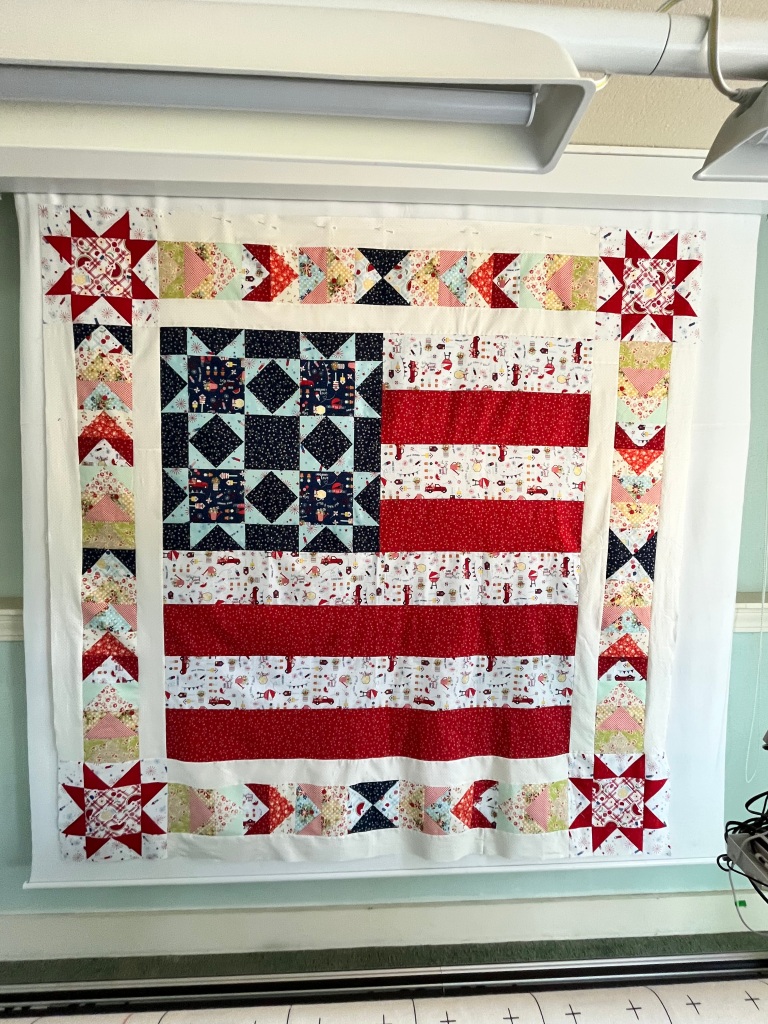
Today I pinned my narrow border to the quilt top to cover the inner and outer join. Next was stitching in the ditch around the inside and outside.

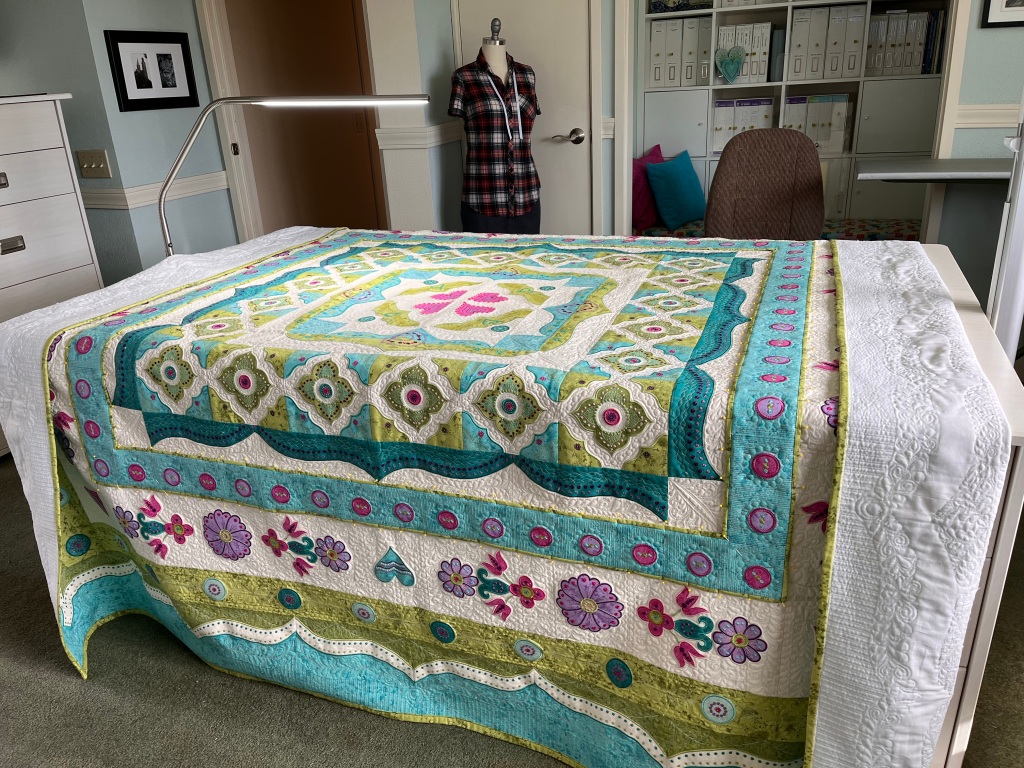


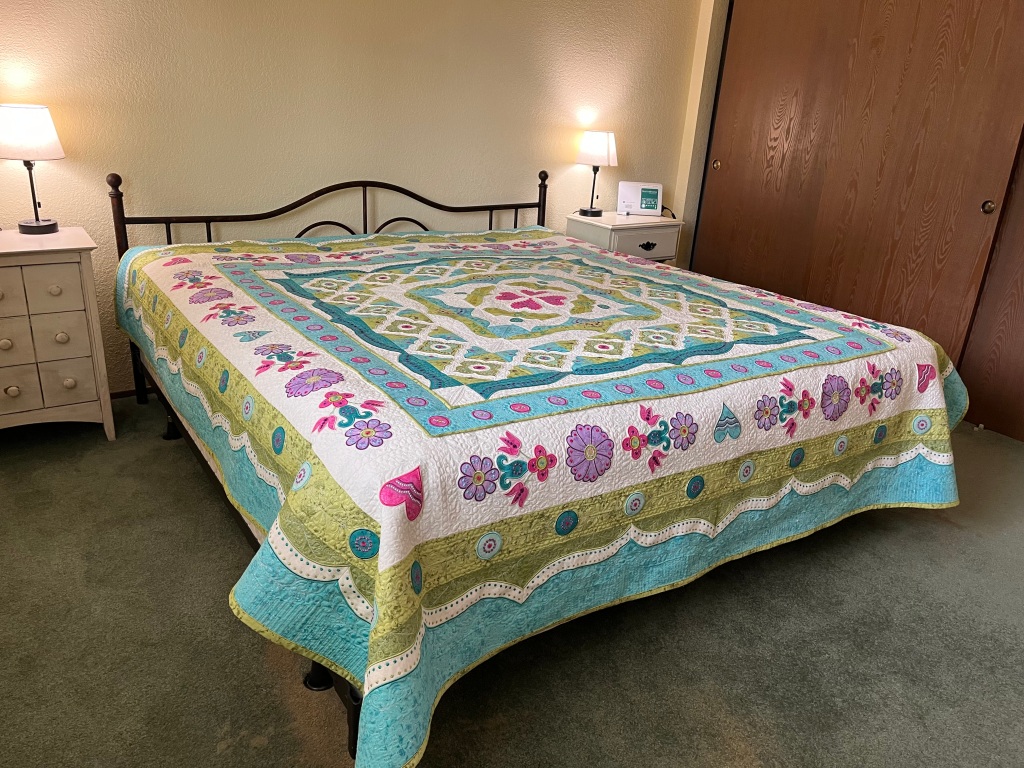
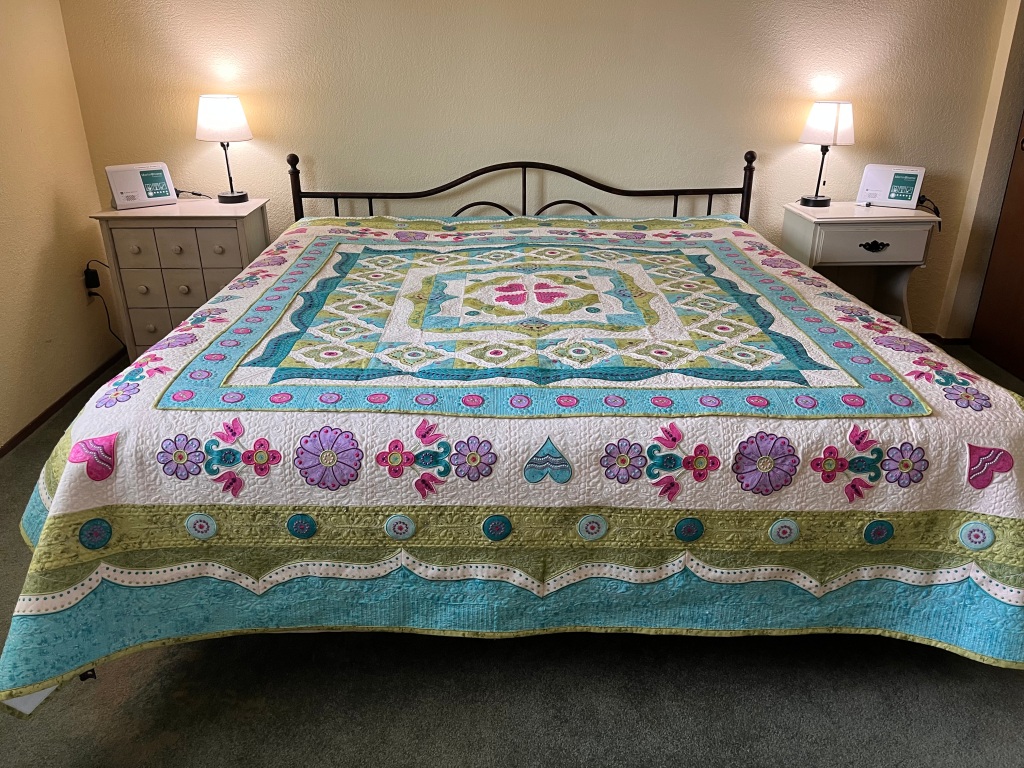
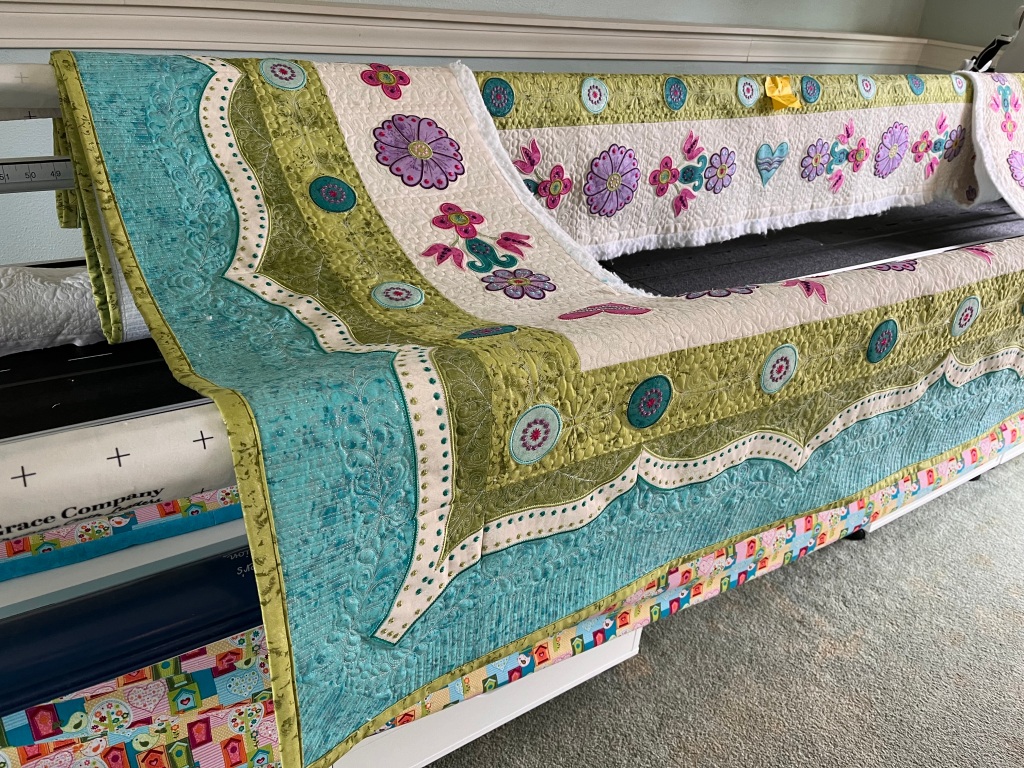
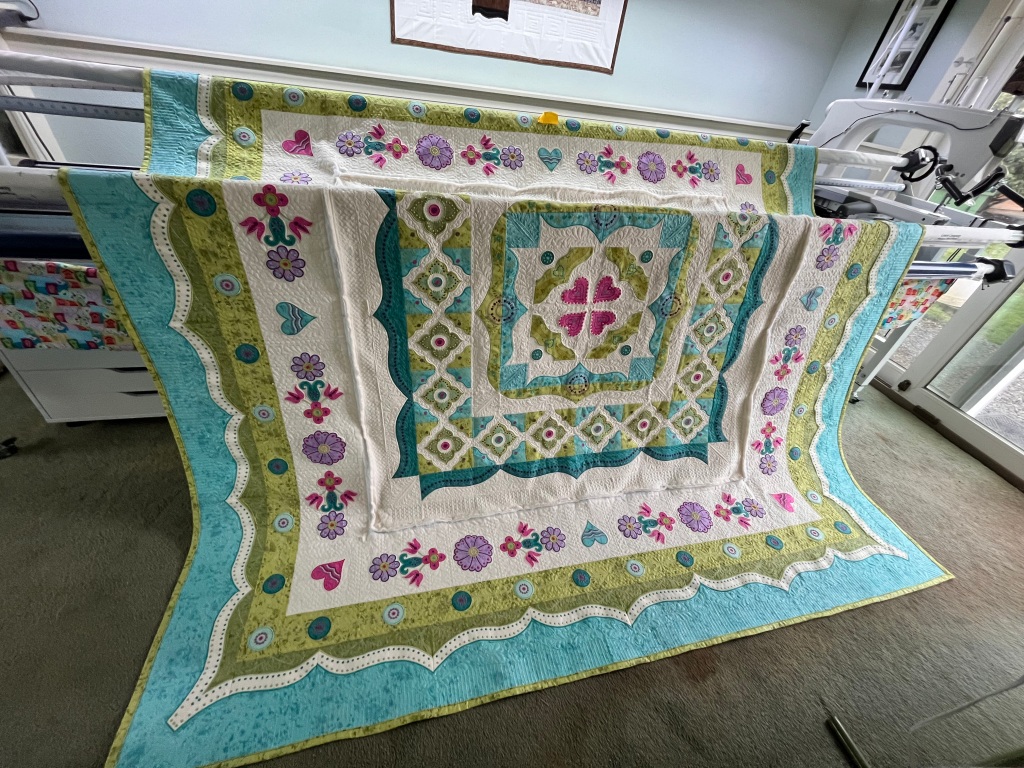
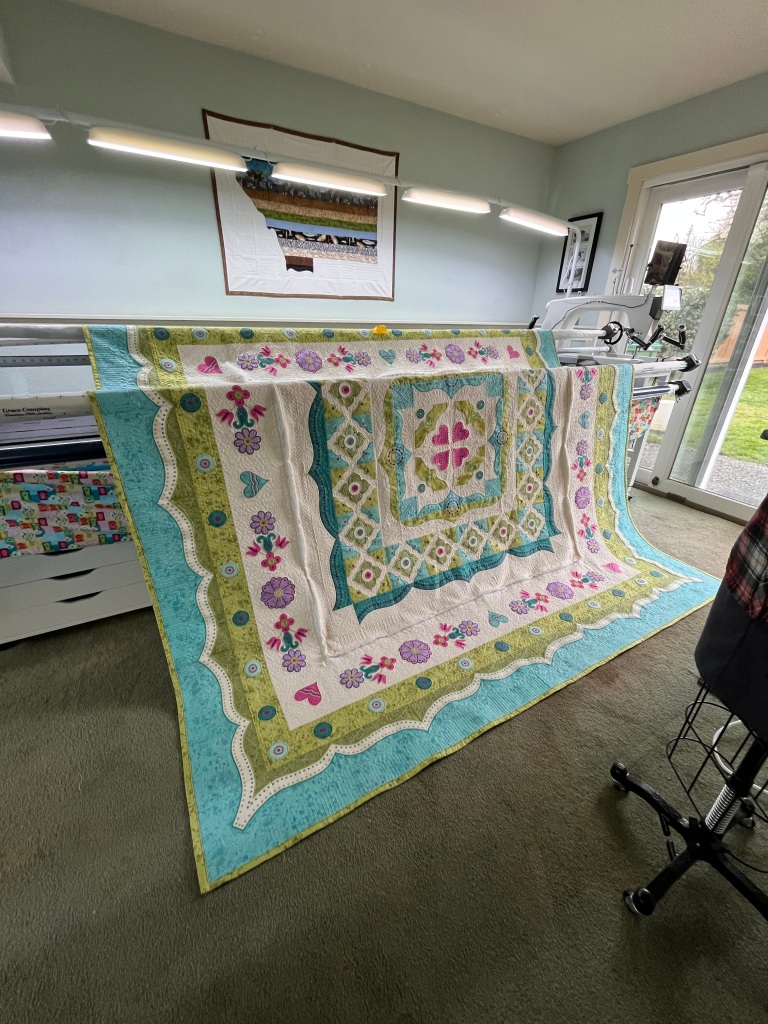
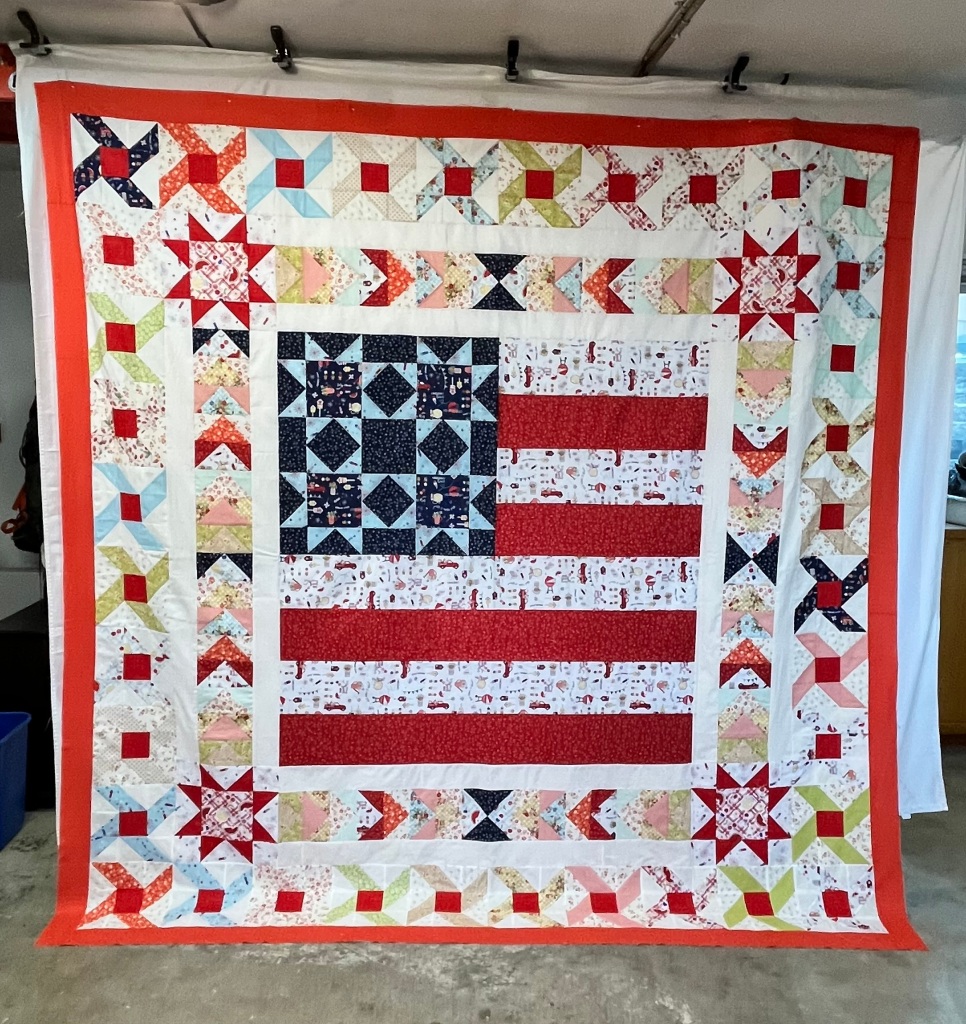
Here is the finished quilt top! Now onto making pillow covers.


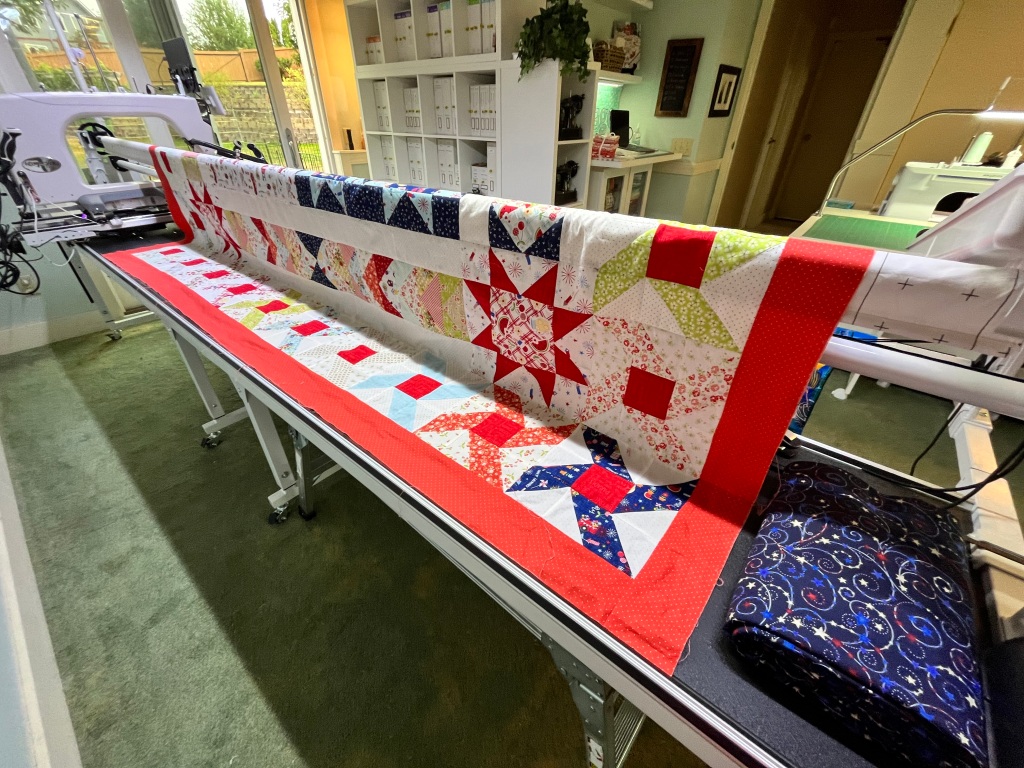
Well today I was able to measure my quilt and trim the narrow border. I joined my binding and have it attached to both the inside and outside of the narrow border. This took me all day! In the meantime my hubby, who also quilts, was having a grand time coming to show me quilt tops he finished….. five to be exact!!
My goal to finish is March 29th for the MEL zoom room. We meet at noon, while I may not finish it by the time we meet, I should be able to finish it tomorrow. 💕


So after much reflection about the quilting on the back, I decided it would be a crime to cover the back. This decision lead me to creating the ‘no hands piped binding’ and applying it to the outer quilt. Next came piecing the center and outer quilt together. Tomorrow I hope to bind my month 6 sashing and appliqué it to the front of the quilt. My goal was finishing it by our MEL zoom this Friday, March 29.


Had a wonderful time using my new skills from Digitizing and Design class. Using Corel Draw I was able to create the following quilt. I decided I wanted the blocks to be on 12 inch squares, so also used my AccuQuilt Go! 12 Qube set. The finished quilt measures 96” square.


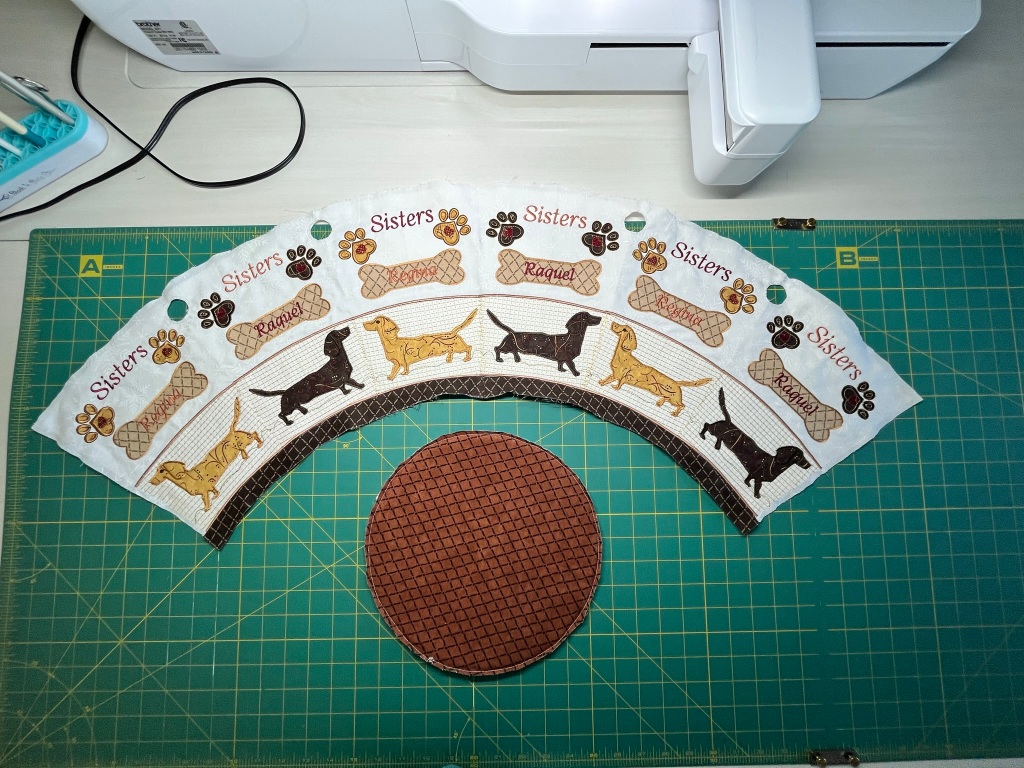
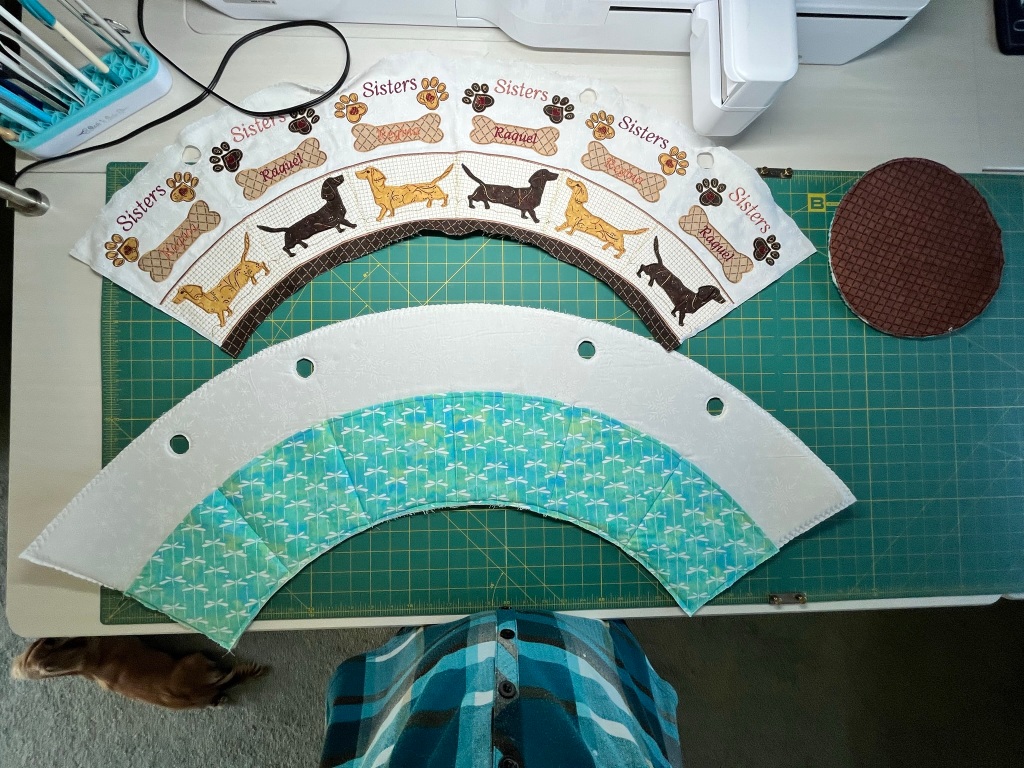
For our Month 05 challenge we learned to create baskets with circular bases and sloping sides. Fortunately I love math and was able to create my patterns in Corel Draw. Part 2 was moving the basic designs into Hatch for digitizing the stitches. From Hatch I was able to create my applique cutting files and design machine files. We needed to create a six segment mirrored design for the exterior. For the inner base of the project, we were to create a mandala.
My goal for this project was to construct a puppy basket. It is fully lined, has grommets with webbing handles, and inner pockets to store snacks, training treats, little bags, etc. I plan to use this when traveling with the pups. It will be a convenient place to drop harnesses, leads, etc.
I have attached my documentation for this project below the images on this post.


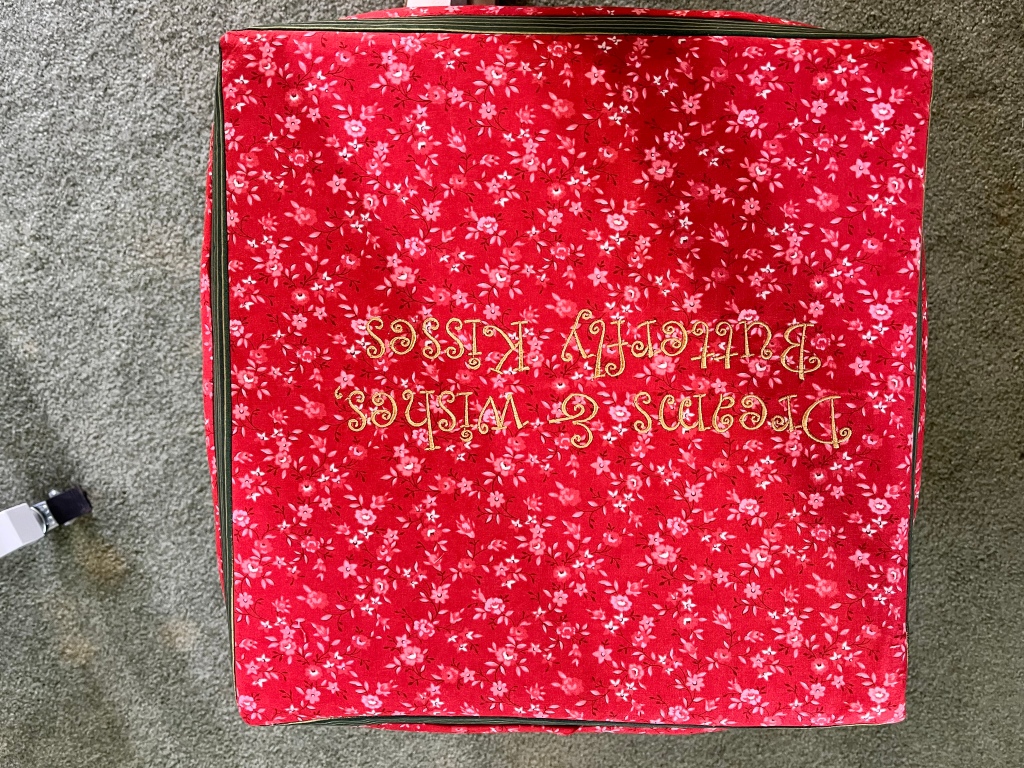
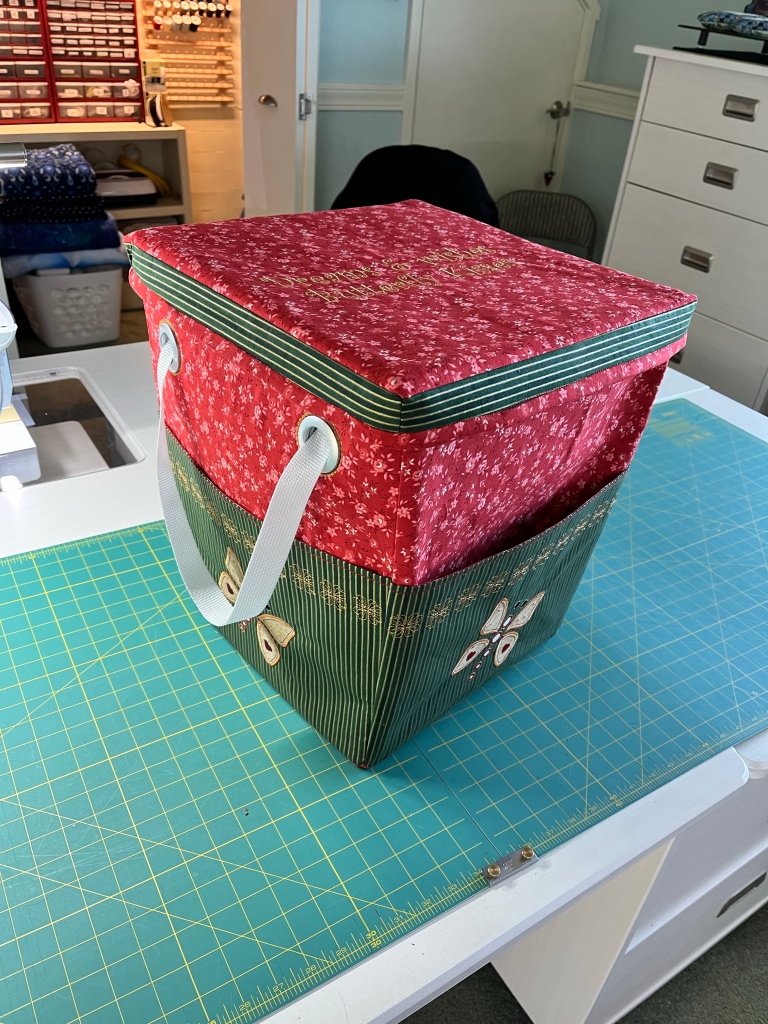
Module4 I used the ‘idea of our challenge’, to create a 6 sided shape from a 2D design to physical 3D construction. I have been wanting to create a bin to take my sewing projects on our 5th Wheel when traveling. I created a six sided shape, however, I wanted it to be sturdy, handle weight and have pockets. I designed a six sided shape that has individual sides, with the addition of 4 outer pockets, decorative grommet openings with web handles, a slip on box lid at the top, and fully lined. I have attached my directions below the pictures. I am excited to use it on our next trip!


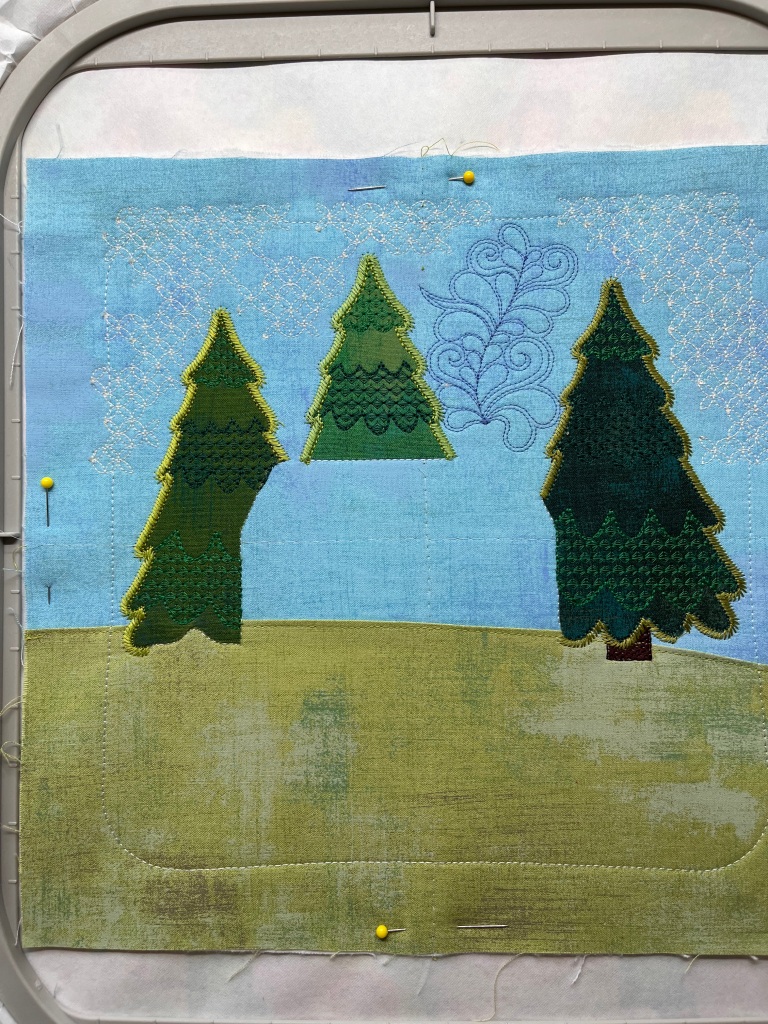
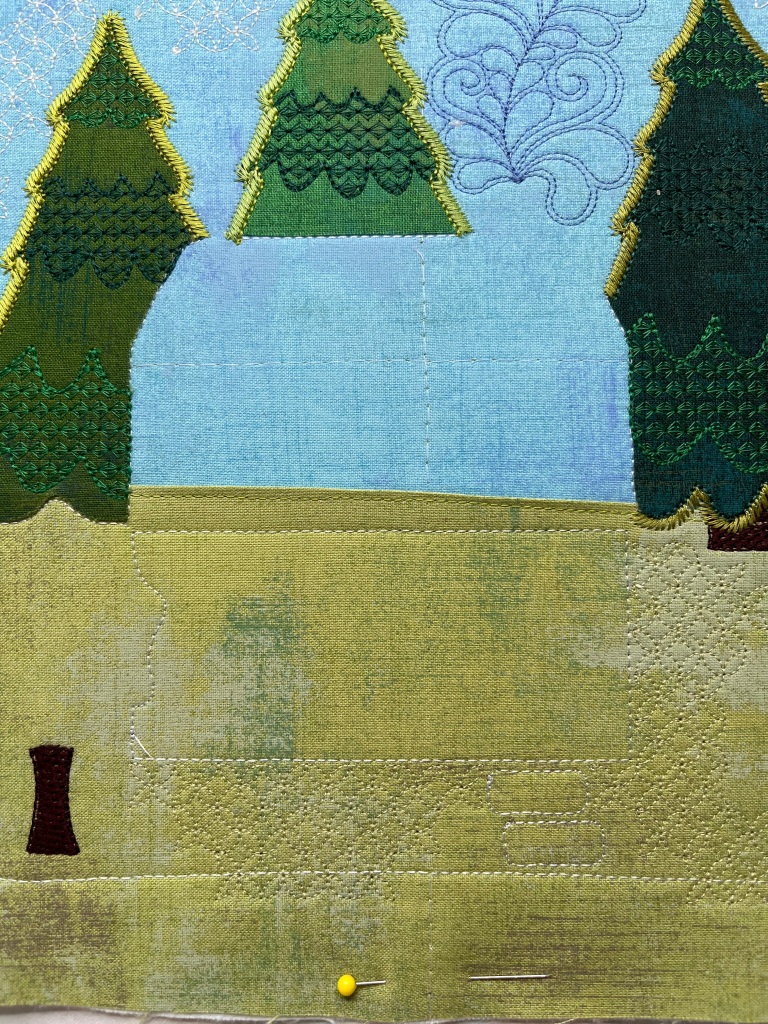
I always learn so much when stitching out designs. Digitizing the idea is one portion but I also find there is so much learning when doing the stitch out. It helps me identify areas to watch for when digitizing. When I stitched out hooping one, I realized that the spiral was not the correct size nor did it have alternating rows. This taught me to be careful and watch to ensure using the same master design. Watching the decorative stitches also helped me really see the underlay and coverage for my appliqué. I still need to practice (and review the lesson) for ‘points’ on appliqué’ stitching. This gets tricky for me in ‘true view’ – sometimes I am not sure how to adjust. I also want to understand how to prevent my block outlines from stitching, while also allowing my quilting motif to be stitched. While my design is not perfect – I love the learning